I have finally reached a point on the chassis and motor where I have to call it done. During final paint and assembly I'll probably add a few more details, but I have to draw a line somewhere and this is it. All the work I've done in the last year or so has been the toughest part and I feel I need to move on before I go freakin' nuts!!!!
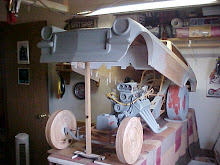
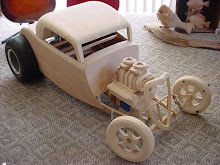
This is the first time that I've gotten a really good look at the entire model in one piece. The body has been stored in the back room for a long time and somehow, in the back of my mind, it had grown to a much larger project than it really is. Now that it's all together and sitting in the middle of the room, it doesn't seem so intimidating.
 I'm currently making a lot of minor adjustments to the chassis and body to get the right stance. I'm also taking a lot of reference pics and measurements for the sheetmetal work inside the body and cockpit area. There are also several cardboard mockups that need to be made for the rear spoiler, rocker panel extensions, windshield and side windows.

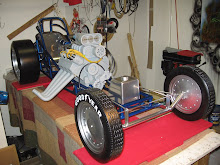
 You gotta love this shot.....................!
As always, comments and suggestions are always welcome....Mike


.JPG)
.JPG)
.JPG)
.JPG)

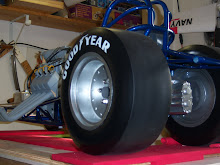
 The center caps were cut on the lathe from a piece of Oak. After prime and paint, they were temporarily held in place with a few spots of silicone. These will be
  I'm quite happy with the end result...........
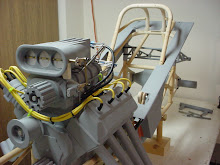
 Details on the engine are coming along nicely. I'm in the process of adding lots of functional hardware that holds the engine parts together. Valve cover bolts and things of that nature are drilled, tapped and threaded, and the threads are then


 The throttle linkage has all been soldered up, and it works too!!!...
 All parts are still a little rough at this point and will need some more
  Brass throttle pedal
 Oil pressure gauge
 Gauge temporarily mounted, waiting for wiring.
 Brake handle and master cylinder.
 As always, comments and suggestions are welcome....Mike
 I'm asked quite often, "how do you make all these parts". The Parachutes are a real good example of how a typical, simple, block style piece is made. The valve covers,